
Journal entries are one of the trickiest transaction types to bulk import — unlike an invoice or a bill, a journal entry has to balance perfectly (debits equal credits) and every account reference has to exist exactly as named in your chart of accounts. Get either of those wrong across a batch of a few hundred entries, and you can end up with an out-of-balance trial balance that takes longer to fix than if you'd entered them one at a time. Here's how to avoid that.
Why Journal Entry Imports Fail More Often Than Other Transaction Types
Three reasons account for most journal entry import errors:
- Debits and credits don't net to zero for one or more entries in the batch — often from a single typo in an amount column.
- Account names in the spreadsheet don't exactly match the chart of accounts in QuickBooks — extra spaces, abbreviations, or accounts that exist under a slightly different name.
- Missing or incorrect entity references — journal entries tied to a customer, vendor, or class that isn't correctly mapped.
Each of these is preventable with the right prep and the right import tool.
Step 1: Structure Your Spreadsheet Correctly
Your journal entry import file needs, at minimum:
- Journal entry number or reference (used to group line items into a single entry)
- Date
- Account name (must match your QuickBooks Online chart of accounts exactly)
- Debit amount
- Credit amount
- Description/memo
- Entity reference (customer/vendor/class, if applicable)
Critical formatting rule: each journal entry typically spans multiple rows (one per line item), grouped by a shared journal entry number. Make sure every group of rows for a single entry actually balances — total debits equal total credits — before you upload anything.
Free template — a pre-built journal entry import template with this structure already set up.
Step 2: Export Your Current Chart of Accounts First
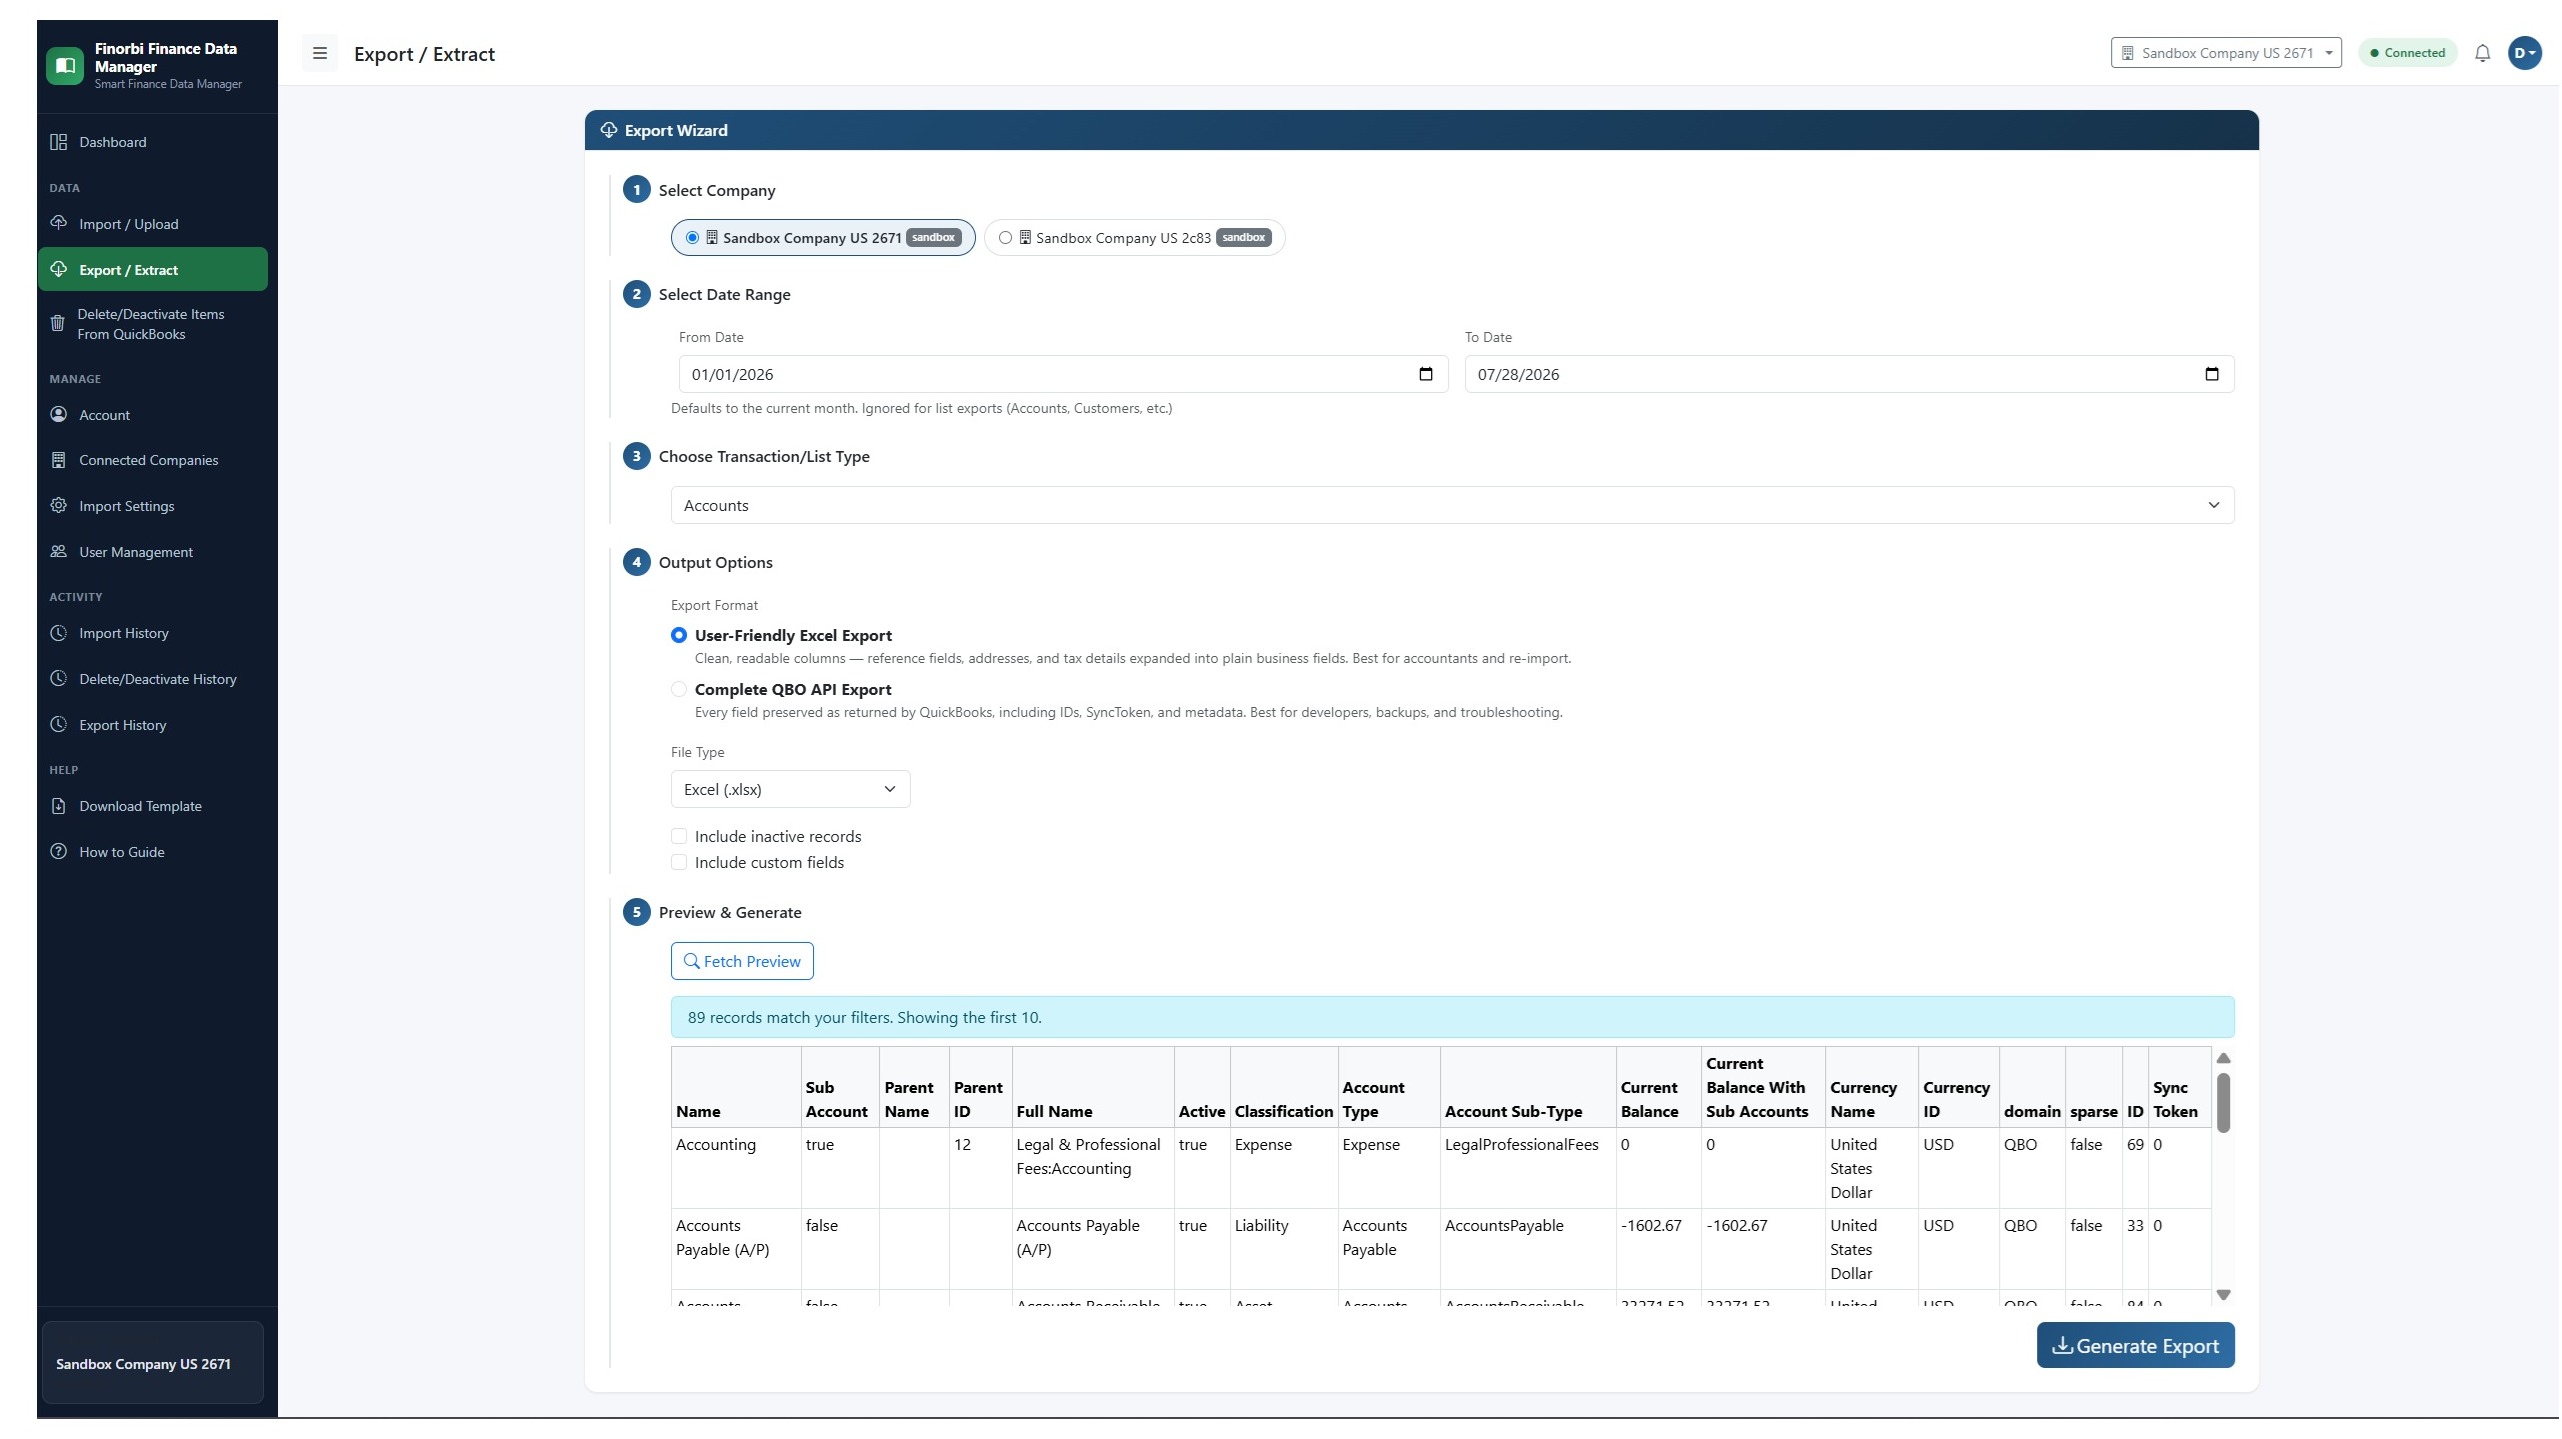
Before mapping anything, export your live chart of accounts from QuickBooks Online and compare it line-by-line against the account names in your import spreadsheet. This single step catches the majority of mapping errors before they ever reach the import tool — it's much faster to fix a naming mismatch in a spreadsheet than to troubleshoot a failed import after the fact.
Step 3: Verify Every Entry Balances Before Uploading
Add a simple check column in your spreadsheet: SUM(debits) - SUM(credits) per journal entry group, and confirm every result is zero before you import. This is the single highest-leverage five minutes you can spend — an unbalanced entry will either fail outright or, worse, post incorrectly and throw off your trial balance in a way that's harder to trace later.
Step 4: Map Fields and Preview
Connect your import tool to QuickBooks Online and map your spreadsheet columns to the corresponding fields. Then — and this matters more for journal entries than almost any other transaction type — review the live preview carefully, checking specifically for:
- Any account reference flagged as "not found" (a sign of a naming mismatch)
- Any entry flagged as out of balance
- Any entity reference (customer/vendor/class) that didn't map correctly
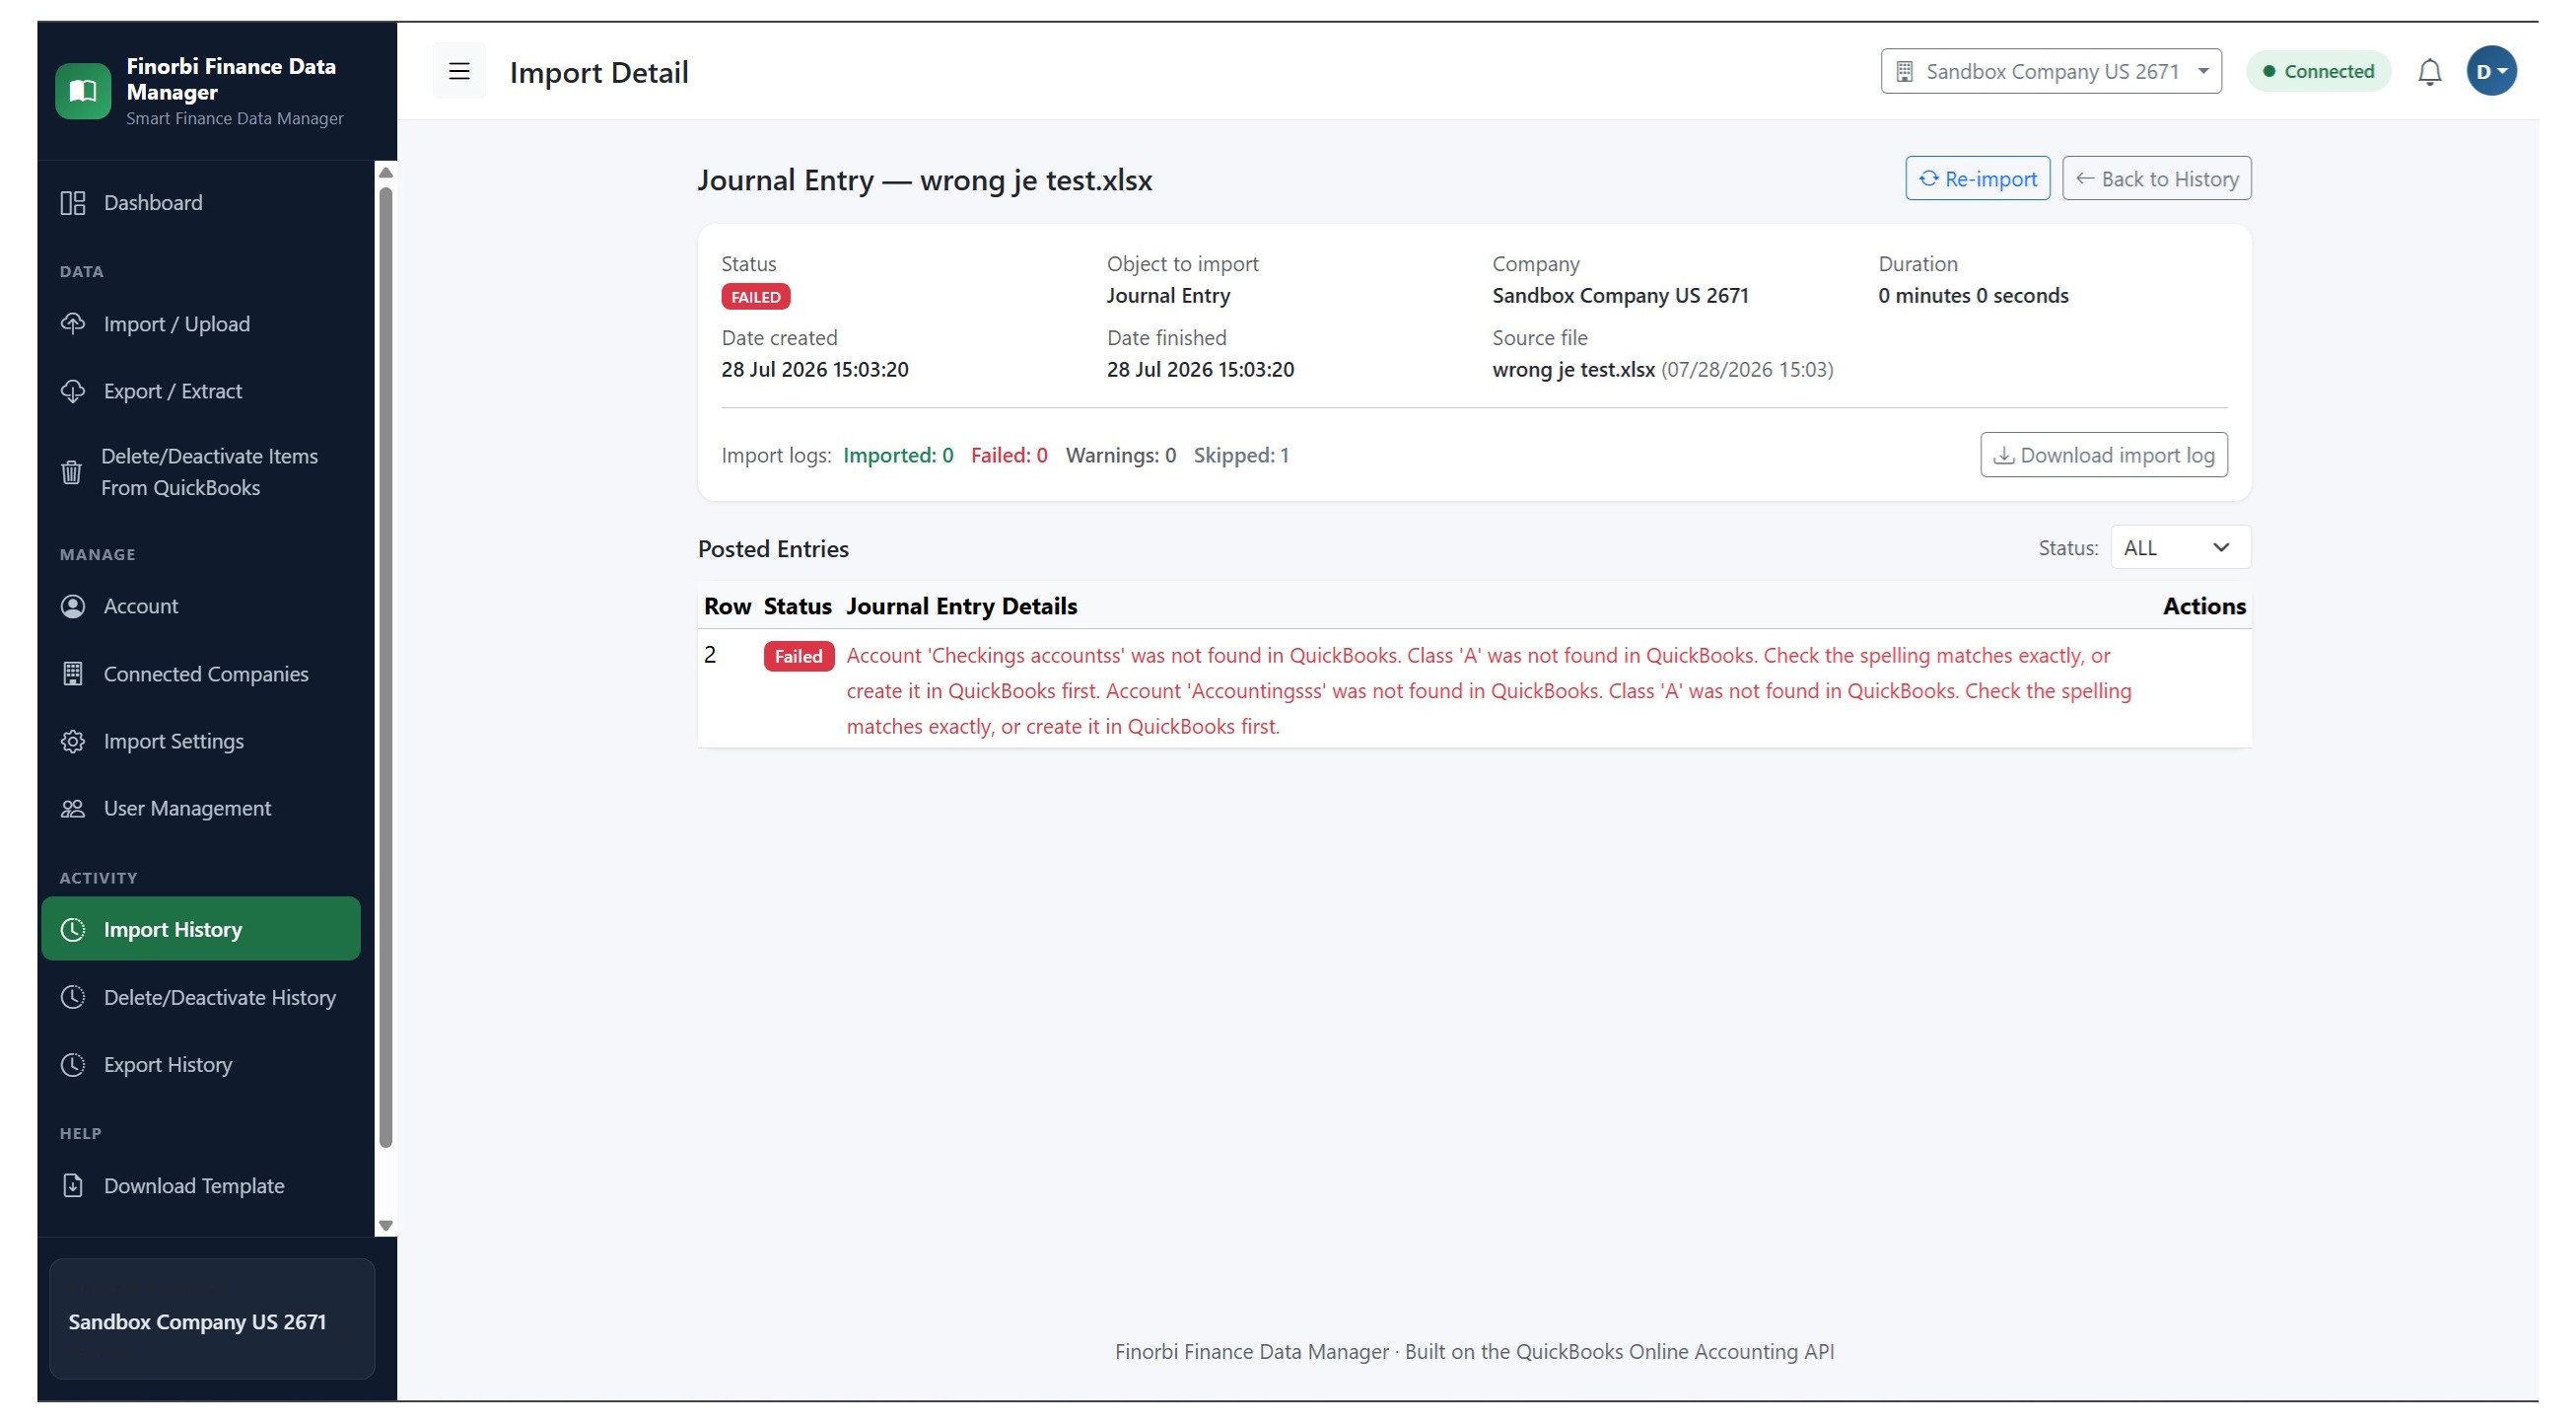
A good import tool will validate every account reference against your live company file and flag mismatches before anything posts — catching exactly the kind of error that's expensive to unwind after the fact.
Step 5: Import in Smaller Batches for Large Volumes
If you're importing hundreds of journal entries covering a long historical period (common during a migration or an audit-driven cleanup), consider breaking the import into smaller batches — by month or by entry type — rather than one massive file. This makes it far easier to isolate and fix any errors that do slip through, and makes a revert (if needed) much less disruptive.
Step 6: Reconcile After Import
Once the import completes, pull a trial balance report and confirm it matches your expected totals. This is your final check that everything posted correctly and in balance.
What If an Entry Posts Incorrectly?
If you catch an error after posting — a wrong account, a wrong amount — don't manually edit the journal entry piecemeal if it was part of a larger batch import. Use your import tool's revert function to undo the full batch cleanly, fix the source data, and re-import. This keeps your audit trail clean and avoids the compounding errors that come from patching individual entries by hand.