
If you've ever opened a spreadsheet of forty, four hundred, or four thousand invoices and thought "I have to type all of this into QuickBooks by hand," this guide is for you. Bulk importing invoices into QuickBooks Online is faster, more accurate, and far less painful than manual entry — as long as you follow a few rules that prevent the two things that make bulk imports go wrong: bad field mapping and no way to check your work before it posts.
This guide walks through the exact process, plus a free template so you're not building your column structure from scratch.
Why Manual Invoice Entry Doesn't Scale
A single invoice with a handful of line items takes maybe two to three minutes to enter by hand — customer lookup, date fields, line items, tax settings, save. That's manageable for five invoices. It's a lost afternoon for two hundred. And it's not just the time: every manual entry is a chance for a typo in an amount, a misapplied tax code, or a duplicate that throws off your reconciliation later.
Bulk importing doesn't just save time — it removes the repetition that causes most data-entry errors in the first place, because you're mapping the rules once instead of re-making dozens of small decisions by hand.
What You'll Need
- A QuickBooks Online account with the invoices' customers already set up (or a tool that can auto-create missing customers as part of the import)
- Your invoice data in a spreadsheet — Excel or CSV
- An import tool connected through QuickBooks' official Accounting API
(This guide uses Finorbi for the screenshots, but the mapping and validation principles apply regardless of which tool you use — the underlying QuickBooks fields don't change.)
Step 1: Prepare Your Spreadsheet
At minimum, your spreadsheet needs these columns:
- Customer name
- Invoice date
- Due date
- Line item description
- Quantity
- Rate/amount
- Product/service or account
- Invoice number (optional, but recommended for tracking)
Free template — grab the pre-built Excel template with these columns already formatted correctly, so you're not guessing at what QuickBooks expects.
A few things to check before you import anything:
- Customer names must match exactly. "Acme Corp" and "Acme Corp." (with the period) will be treated as two different customers unless your tool is set to fuzzy-match or auto-create. Clean this up in your spreadsheet first.
- Dates should be in a consistent format. Mixed date formats in the same column are one of the most common causes of import errors.
- Line item accounts/products need to exist in QuickBooks already, or your tool needs an "auto-create missing items" setting turned on — otherwise those rows will fail validation.
Step 2: Connect Your Import Tool to QuickBooks Online
Use a tool that connects via OAuth 2.0 through QuickBooks' official Accounting API — this means you're logging in through QuickBooks directly, and the tool never sees or stores your username or password. You can revoke access at any time from either side.
Avoid any tool that asks for your QuickBooks login credentials directly rather than routing you through Intuit's own authorization screen — that's a sign it's not using the official API.
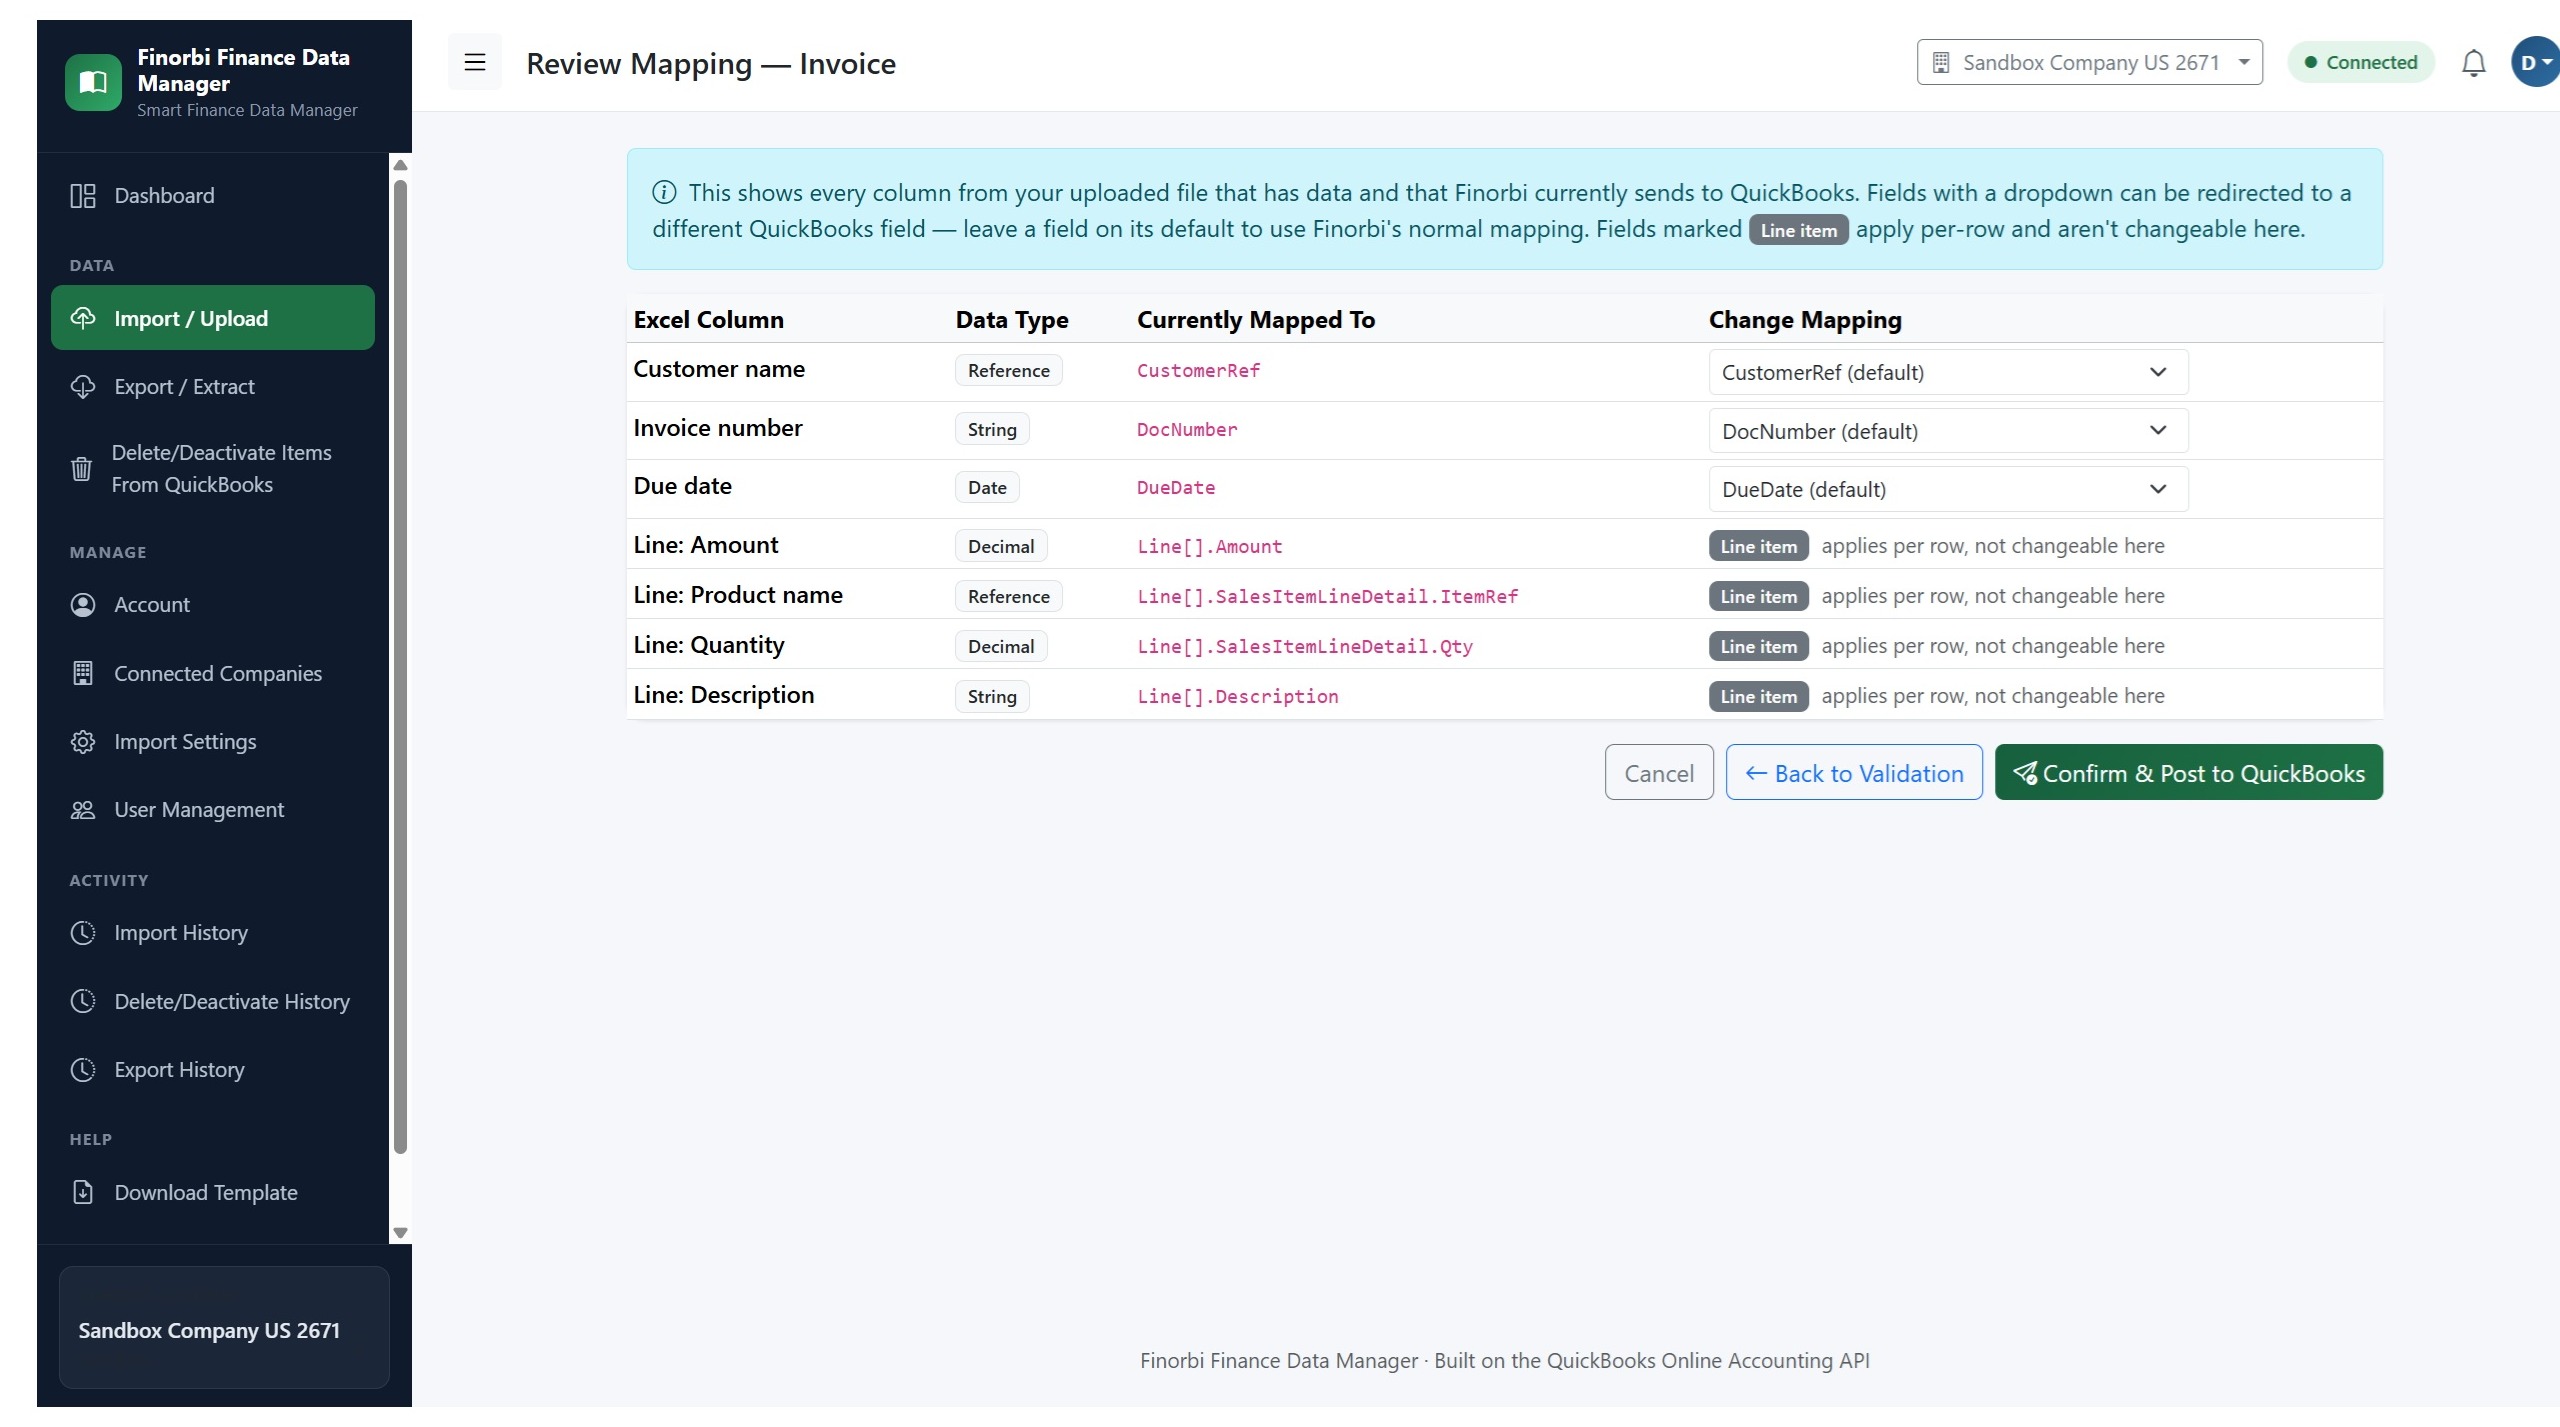
Step 3: Map Your Spreadsheet Columns to QuickBooks Fields
Upload your file and map each column to its matching QuickBooks field. Most modern import tools will auto-detect common headers like "Customer" or "Invoice Date" and pre-fill the mapping — you just need to confirm it's correct, especially for less obvious fields like which column maps to "Class" or "Location" if you use those.
Step 4: Preview Before You Post
This is the step that separates a safe bulk import from a risky one. Before anything touches your live QuickBooks file, you should be able to see a row-by-row preview showing exactly what will be created — and any errors flagged before they happen, not after.
Common issues a good preview will catch:
- A customer that doesn't exist yet and isn't set to auto-create
- A product/service or account reference that's misspelled or missing
- A date outside your expected range (a common sign of a formatting error upstream)
- Duplicate invoice numbers
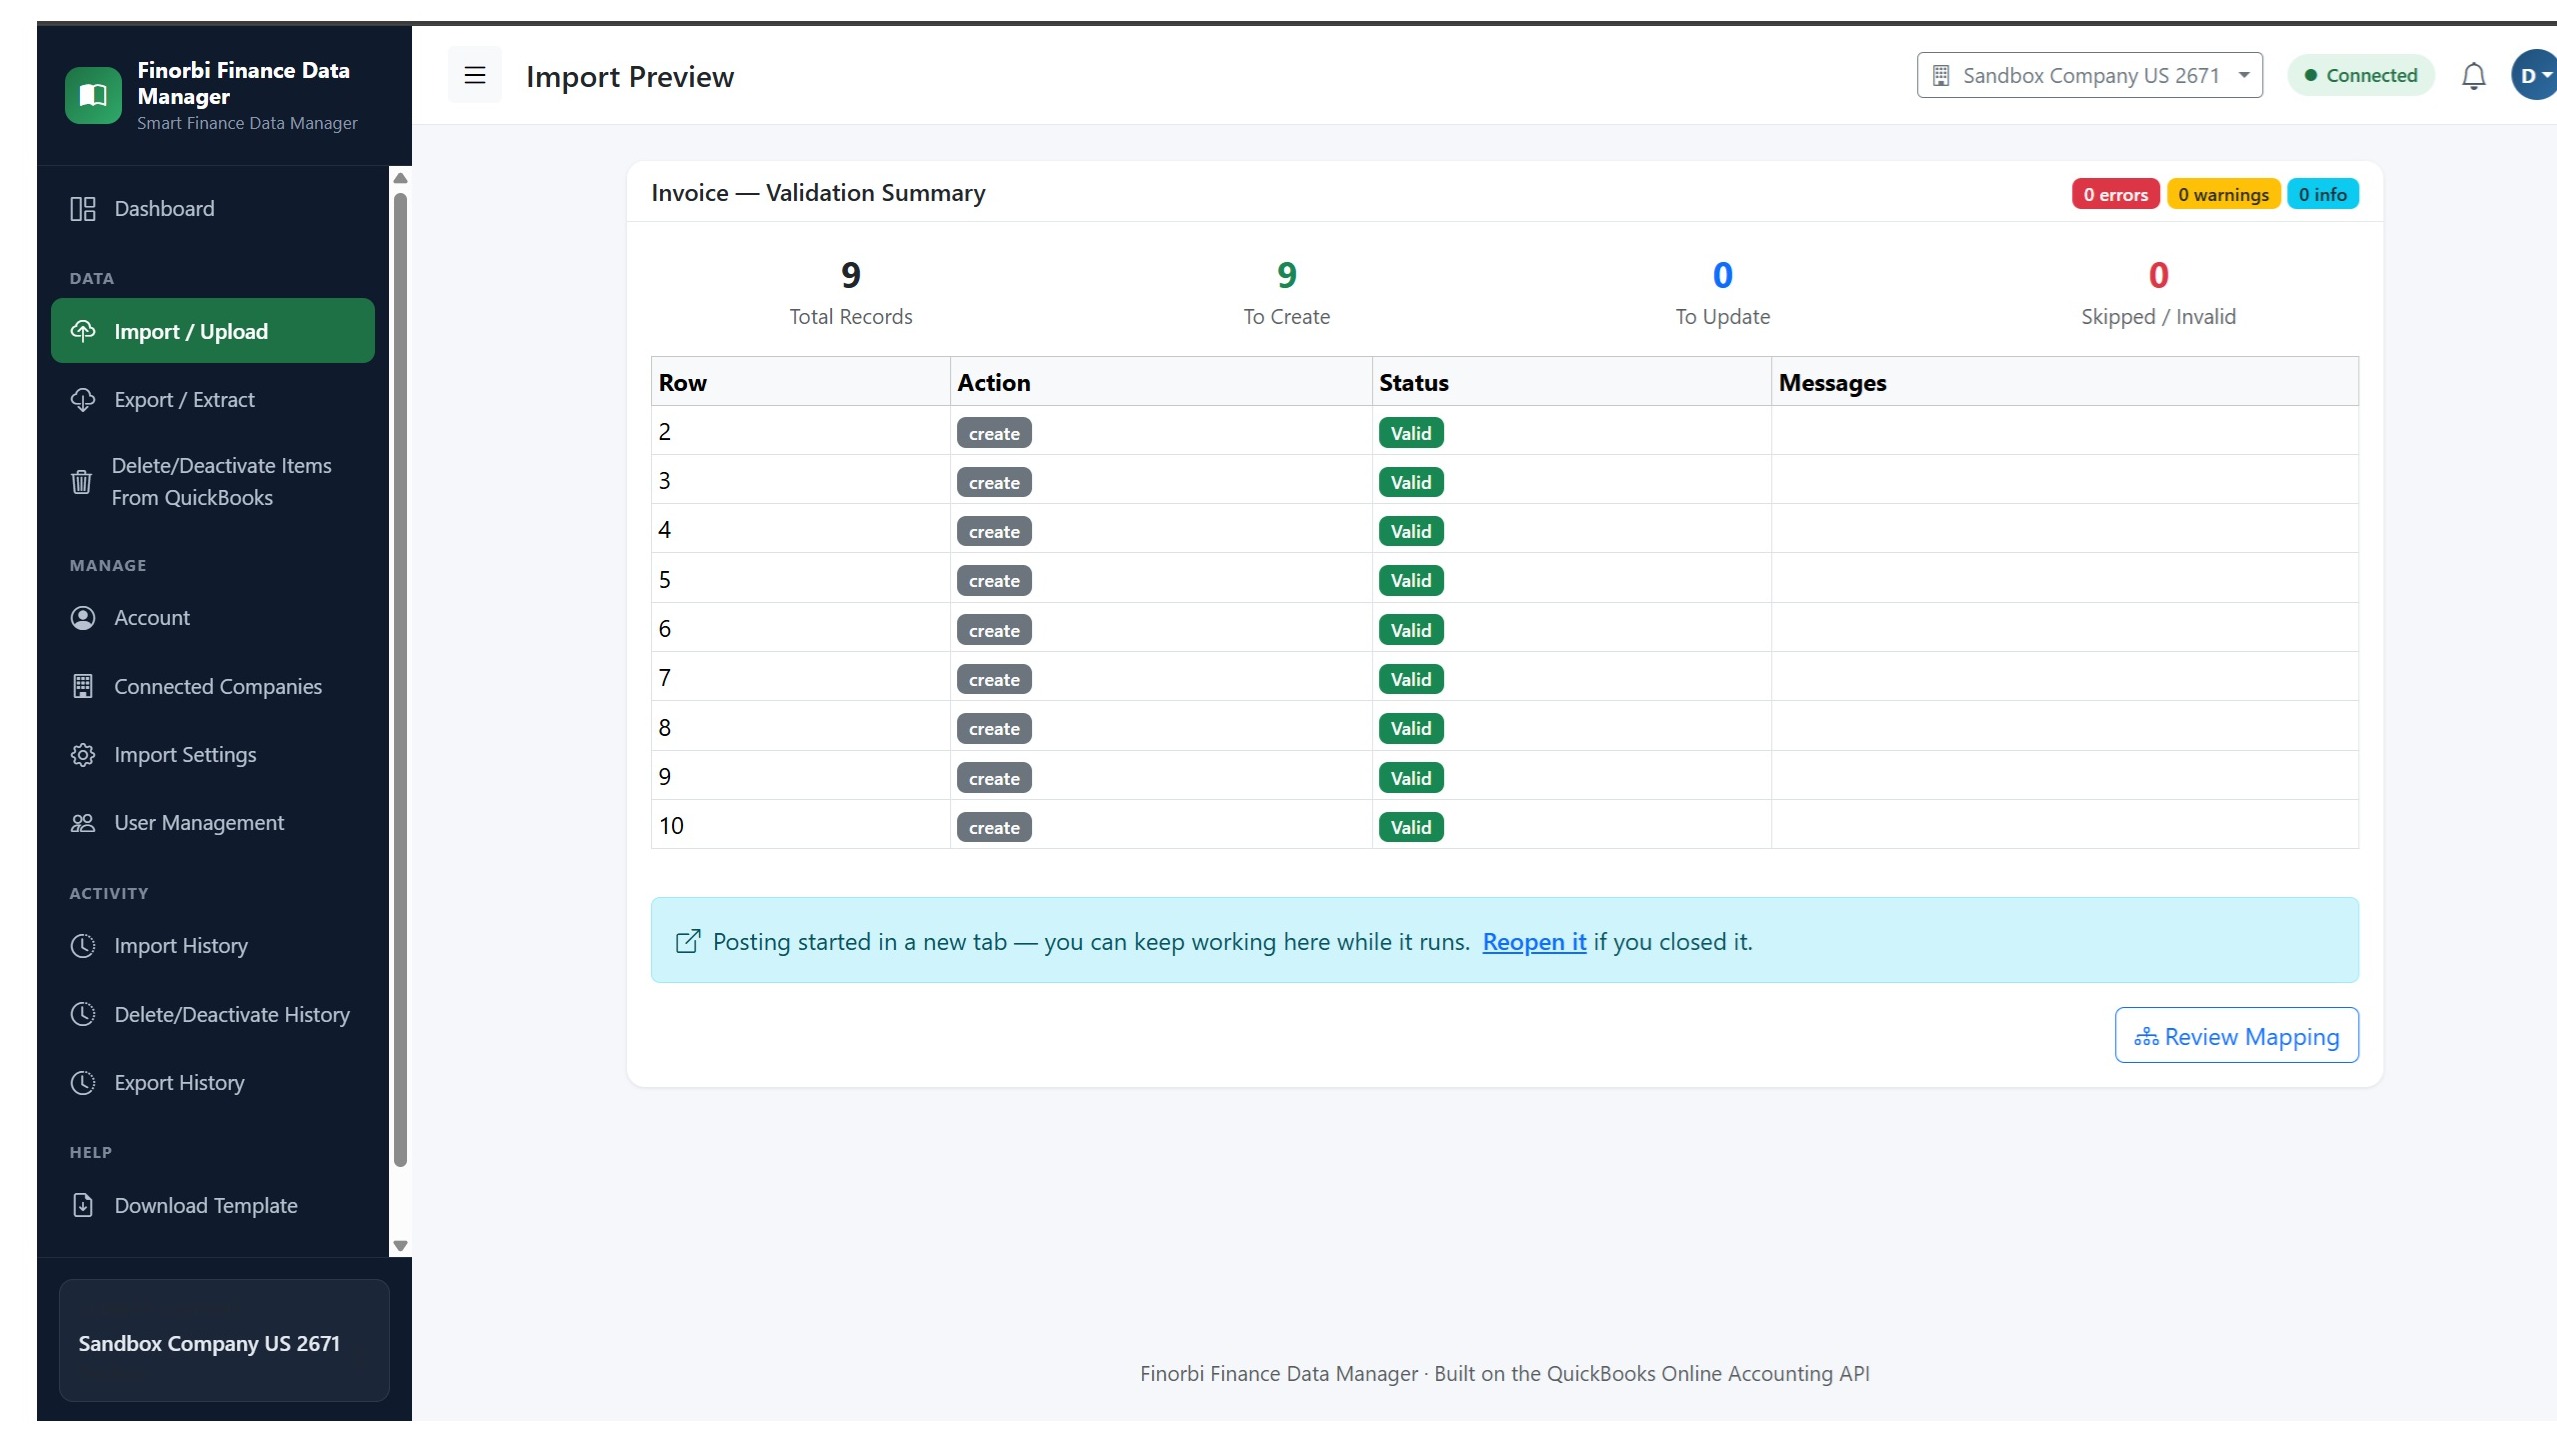
If you see errors, fix them in your spreadsheet and re-upload rather than trying to patch individual rows mid-import — it's faster and leaves a cleaner trail.
Step 5: Import and Verify
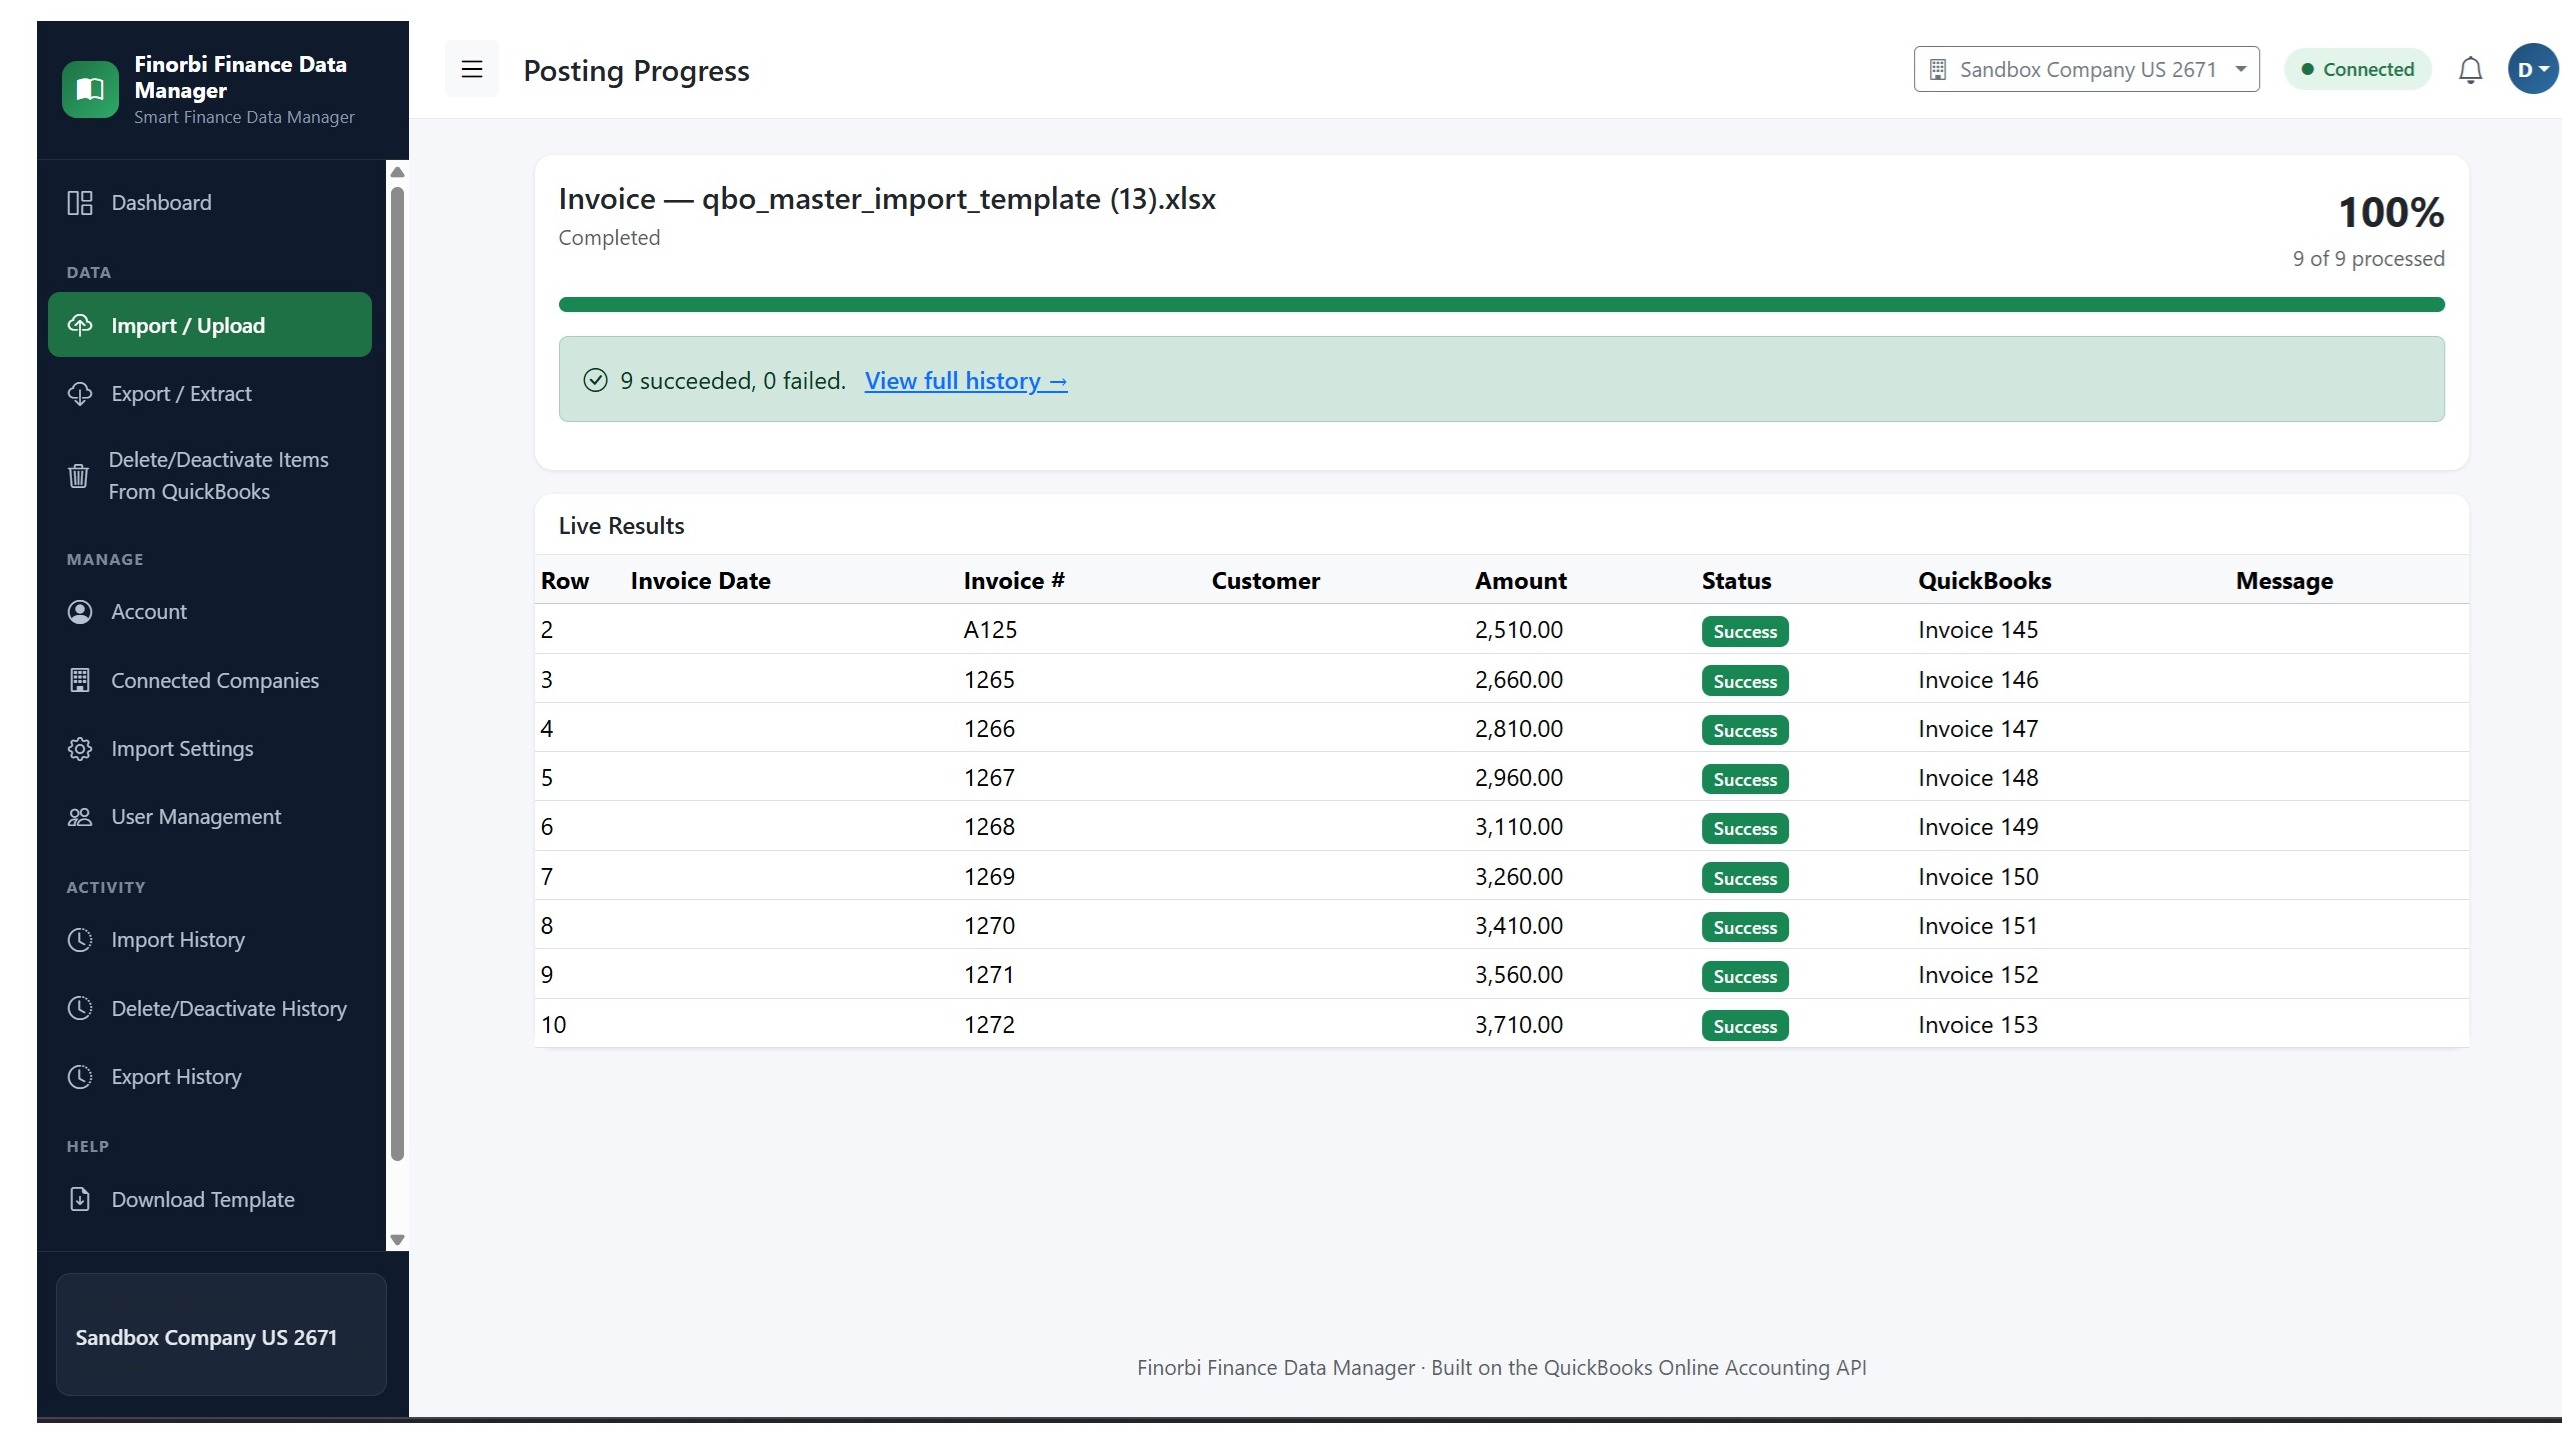
Once the preview looks clean, run the import. Depending on volume, this typically takes seconds to a couple of minutes. Then spot-check a handful of the newly created invoices directly in QuickBooks against your source spreadsheet to confirm everything landed where expected.
What If Something Goes Wrong?
Even with a clean preview, sometimes you'll spot something after the fact — wrong date range selected, or a mapping choice that wasn't quite right. This is where one-click revert matters: a good import tool can undo an entire batch cleanly, without you having to hunt down and delete records one at a time. If your tool doesn't offer this, use QuickBooks' Audit Log to identify every transaction created in that batch by timestamp before doing any manual cleanup.
A Note on Recurring Imports
If this isn't a one-time cleanup but a recurring part of your workflow — say, you invoice from a separate billing system and need those invoices in QuickBooks weekly — look for a tool that supports saved mapping templates and, ideally, scheduled or automated imports, so you're not rebuilding the mapping from scratch every time.